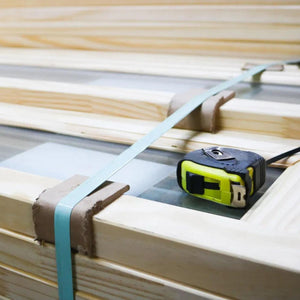
Measure & Order
Select the right door for you is easy! If you are looking to replace an existing door, the fastest way to obtain the right dimensions for your new door is to measure your old one. Be sure to note the height, width and depth of the door.
If you do not have an existing door to measure from, following the steps below to get the finished opening size of your doorway:
- Measure the height of the door opening from the sill to the underside of the frame. Obtain this measurement from the left, middle and right sides of the opening.
- Measure the width of the door opening from the inside of the frame to the inside of the frame. Obtain this measurement from the top, middle and bottom of the opening.
- Measure the depth of the door jamb. Typically this dimension is 1 ⅜”, however, for some of our bifold doors, the depth is 1 ⅛”.
- Use the smallest measurement from Step 1 and the smallest measurement from Step 2 (should variations exist) when selecting the dimensions of your new door.
Finishing
Preparation for Clear/Unfinished or Primed Doors:
- Remove door from frame and lay flat for best performance.
- Sand the entire door lightly, using #180 grit sandpaper (heavy sanding with a coarser grade paper could sand through veneers). Remember to always sand in the direction of the grain!
- Thoroughly remove all dust prior to applying finish. A tack cloth is recommended to clean and prepare your surface for finishing. DO NOT use compressed air to blow off doors as moisture in the air will cause water spotting on stained finishes.
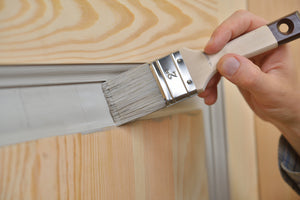
Painting Doors:
- Select a high-quality oil-based pigmented primer. Water based finishes may raise grain. DO NOT use water based primer or paint. Use will void all Door to Door warranties.
- An exterior grade paint must be used on all exterior doors.
- Cover all surfaces evenly!
- Be sure to seal top and bottom of doors, as well as all sides.
- Apply a minimum of two top coats, sanding between coats.
- For glazed doors allow top coat to lap onto glass 1/16” to protect from moisture.
- DO NOT use black or dark colored top coats on doors that will be exposed to direct sunlight for extended periods of time throughout the daylight hours!
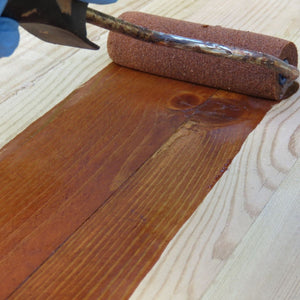
Staining Doors:
- Use a recommended oil-based pre-stain or conditioner prior to staining.
- Apply oil-based semitransparent stain or clear undercoat as recommended for exterior or interior application.
- Apply three coats of clear top coat varnish or polyurethane and lightly sand between coats.
- Exterior finishes MUST have Ultra Violet (UV) inhibitors. For glazed doors, allow top coat to lap onto glass 1/16” to protect from moisture.
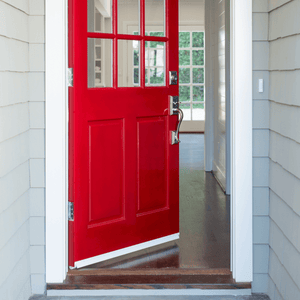
Installation
Slab Doors:
After receiving your new interior door from Door To Door, we are sure that you will be anxious to get started with the quick and easy installation, find out how below!
What you will need:
- Drill
- Hole Saw Kit
- 3/8-inch drill bit
- 7/8-inch spade bit
- Screwdriver
- Utility knife/Box cutter
- Chisel
- Tape measure
- Safety glasses
- Pencil to mark measurements
Additional tools/items:
- Clamps
- Door hardware (new or existing)
- Hinges (new or existing)
The first step in the process is to remove the existing door from the frame. Remember, you’ll want to use the old door as a template for hole placement on the new one so make sure to disassemble it carefully. Remove the door hardware and unscrew it from the hinges, working from the bottom of the door up. Once the old door is safely removed align it next to your new door with the hinged-side facing up. To keep the doors from slipping attach a clamp at the top and bottom of the long side of the door. Now you’re ready to begin.
- Carefully mark the location of the door hinges on your new door using the old door as a guide. Stand the door upright to mark the location of the doorknob on your new door, again using the old one as a guide. Next, turn to the door’s side and mark out the position of the lock set. Once all the marking is complete, unclamp the two doors.
- Using the ⅜” drill bit, drill a shallow guide hole in the face of the slab door to mark the center of the hole where the door handle will be inserted.
- Drill a shallow guide hole in the edge of the door where the center of the latch hole will be positioned.
- Using the hole saw attachment for your drill. Cut the opening for the lockset in the face of the door, using the hole you made in step two to position the pilot bit. Press firmly as you drill, making sure you're going in straight.
- DO NOT CUT ALL OF THE WAY THROUGH. Stop before the teeth of the hole saw breaks through the other side.
- Switch to the other side, inserting the pilot bit into the hole, and finish cutting the opening.
- Attach the 7/8-inch spade bit to your drill. Using the guide hole on the edge of the door that you made in step three, drill a hole through to the inside of the lockset hole you made in steps five and six.
- Insert the latch mechanism into the hole you just drilled so that it protrudes from the edge of the door. Place the beveled edge of the latch and face it toward the doorjamb.
- Trace the outline of the latch plate on the edge of the door, then remove and set aside the latch mechanism.
- Cut along the outline of the latch strikeplate with the chisel about 1/8th of an inch (or no deeper than the thickness of the latch plate).
- Using the strikeplate to measure depth, gently drive out the waste until the strikeplate is flush with the door. Use the lockset’s included instructions to finish the door.
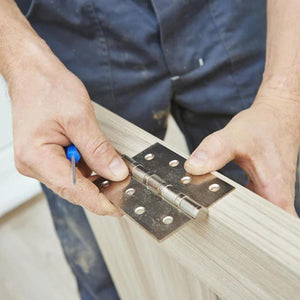
- Installing the hinges: Lay the new door on top of the old one, then use a ruler to trace horizontal guidelines for the top and bottom of the hinge hardware from old door to the new.
- Place the hinge hardware on the edge of the new door, using the horizontal guidelines you traced in step 11. Trace the vertical edge of the hinge mortice with a pencil.
- Using your chisel, hollow out the area you outlined so that the hinge mortice will lie flush with the edge of the door. You should cut no deeper than the thickness of the mortice.
- Replace the hinge mortice in the hollowed-out area along the door edge. Pre-drill the holes for the hinge screws, and then attach the hinge plates.
- Reattach the door to the doorframe.
- Open and close the new door repeatedly to check for a smooth swing, a good catch on the locking mechanism and a good fit.
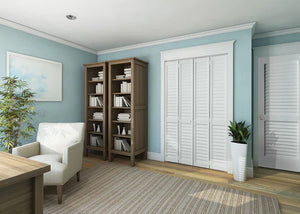
Bifold Doors
Bifold doors consists of two panels joined with hinges and the leading panel follows an overhead guide track, while the trailing one pivots on a holder attached to the door jamb and the floor. After receiving your new bifold door from Door To Door, we are sure that you will be anxious to get started with the quick and easy installation, find out how below!
What you will need:
- Drill
- Screwdriver
- Hammer
- Hacksaw
- Bifold hardware
- Measuring tape
- Safety glasses
- Pencil to mark measurements
